
You already know LTX Part 4 - Make your own IC-LoRA
In Part 3 you got to play with my Blackout effect. You give it a normal video and it hands back the same video with every light switched off. This time I want to show you how I (and Grok Bot) actually
Article
Job breakdowns
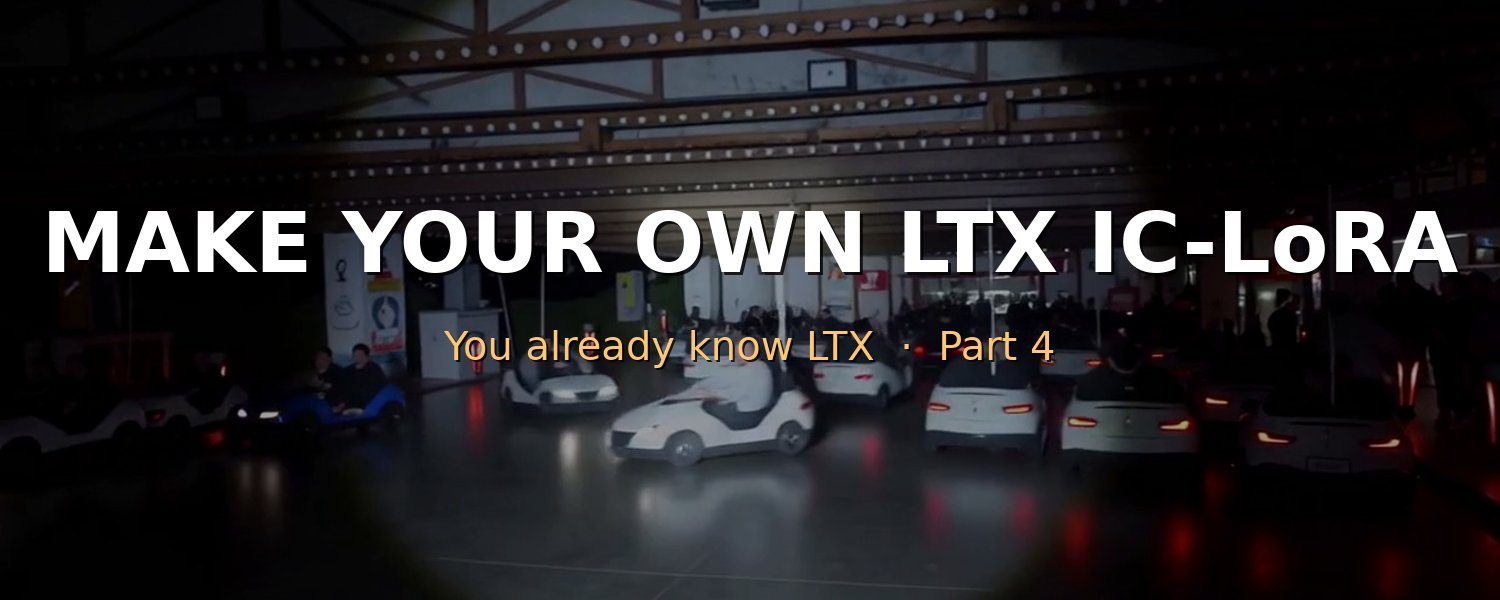
In Part 3 you got to play with my Blackout effect. You give it a normal video and it hands back the same video with every light switched off. This time I want to show you how I (and Grok Bot) actually made that effect, so you can make your own.
The effect can be ANYTHING. Day to night, dry to rain-soaked, summer to snow, clean to overgrown. If you can describe it, you can probably train it.
I'm writing this assuming it's your very first time with any of this: AI video, LoRAs, Grok Bot, ComfyUI, all of it. So I'll explain every tool and every term.
This will come off as VERY technical, but you don't need to understand everything. Grok Bot will walk you through the entire process. Let’s get started!
The basics, from zero
What's a LoRA?
A LoRA is a small add-on file that teaches a big AI model one new trick. Training a whole video model from scratch costs a fortune. A LoRA skips that. It's a short, focused lesson laid on top of the model. Think of LTX as a really talented artist, and the LoRA as you saying "here's the one specific thing I want you to do."
A LoRA is just one file, usually ending in .safetensors (that's simply the standard file format for these). You load it on top of LTX whenever you want that trick.
What's an IC-LoRA?
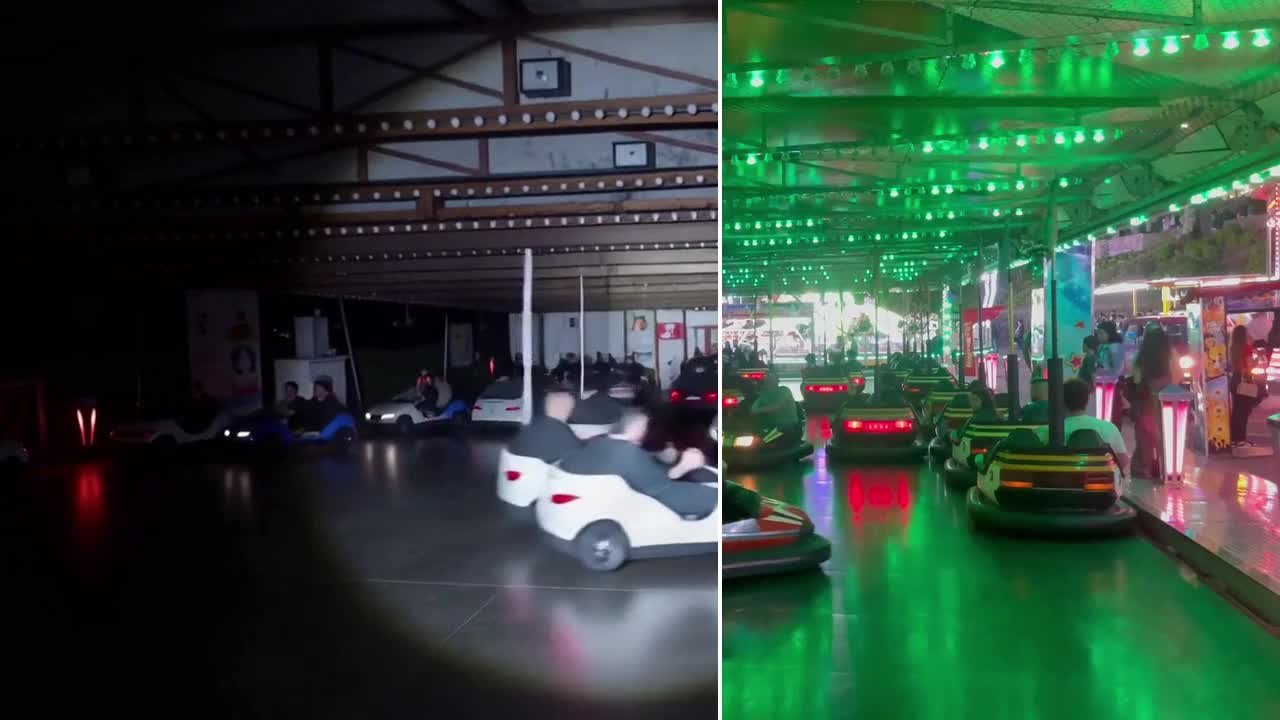
IC stands for in-context. A regular LoRA usually teaches a style or a character for making brand-new videos. An IC-LoRA is a video-to-video LoRA. You hand it a video you already have, and it gives you back the same video with one change. Same people, same camera movement, same action. Only your effect changes.
How it learns: pairs. You teach an IC-LoRA by showing it examples. Each example is a pair of two short videos of the exact same shot:
-
The before clip: the normal video.
-
The after clip: the same shot with your effect applied, and nothing else different.
Show it enough good pairs and it works out the rule on its own: "whatever video I'm given, make this change to it." Building those pairs is most of the work in this tutorial.
The trigger word. Once your LoRA is trained, you switch the effect on by putting a special made-up word at the start of your prompt. That's the trigger word. Mine is BL4CKOUT. It's spelled with a 4 on purpose, so it never collides with the normal word "blackout."
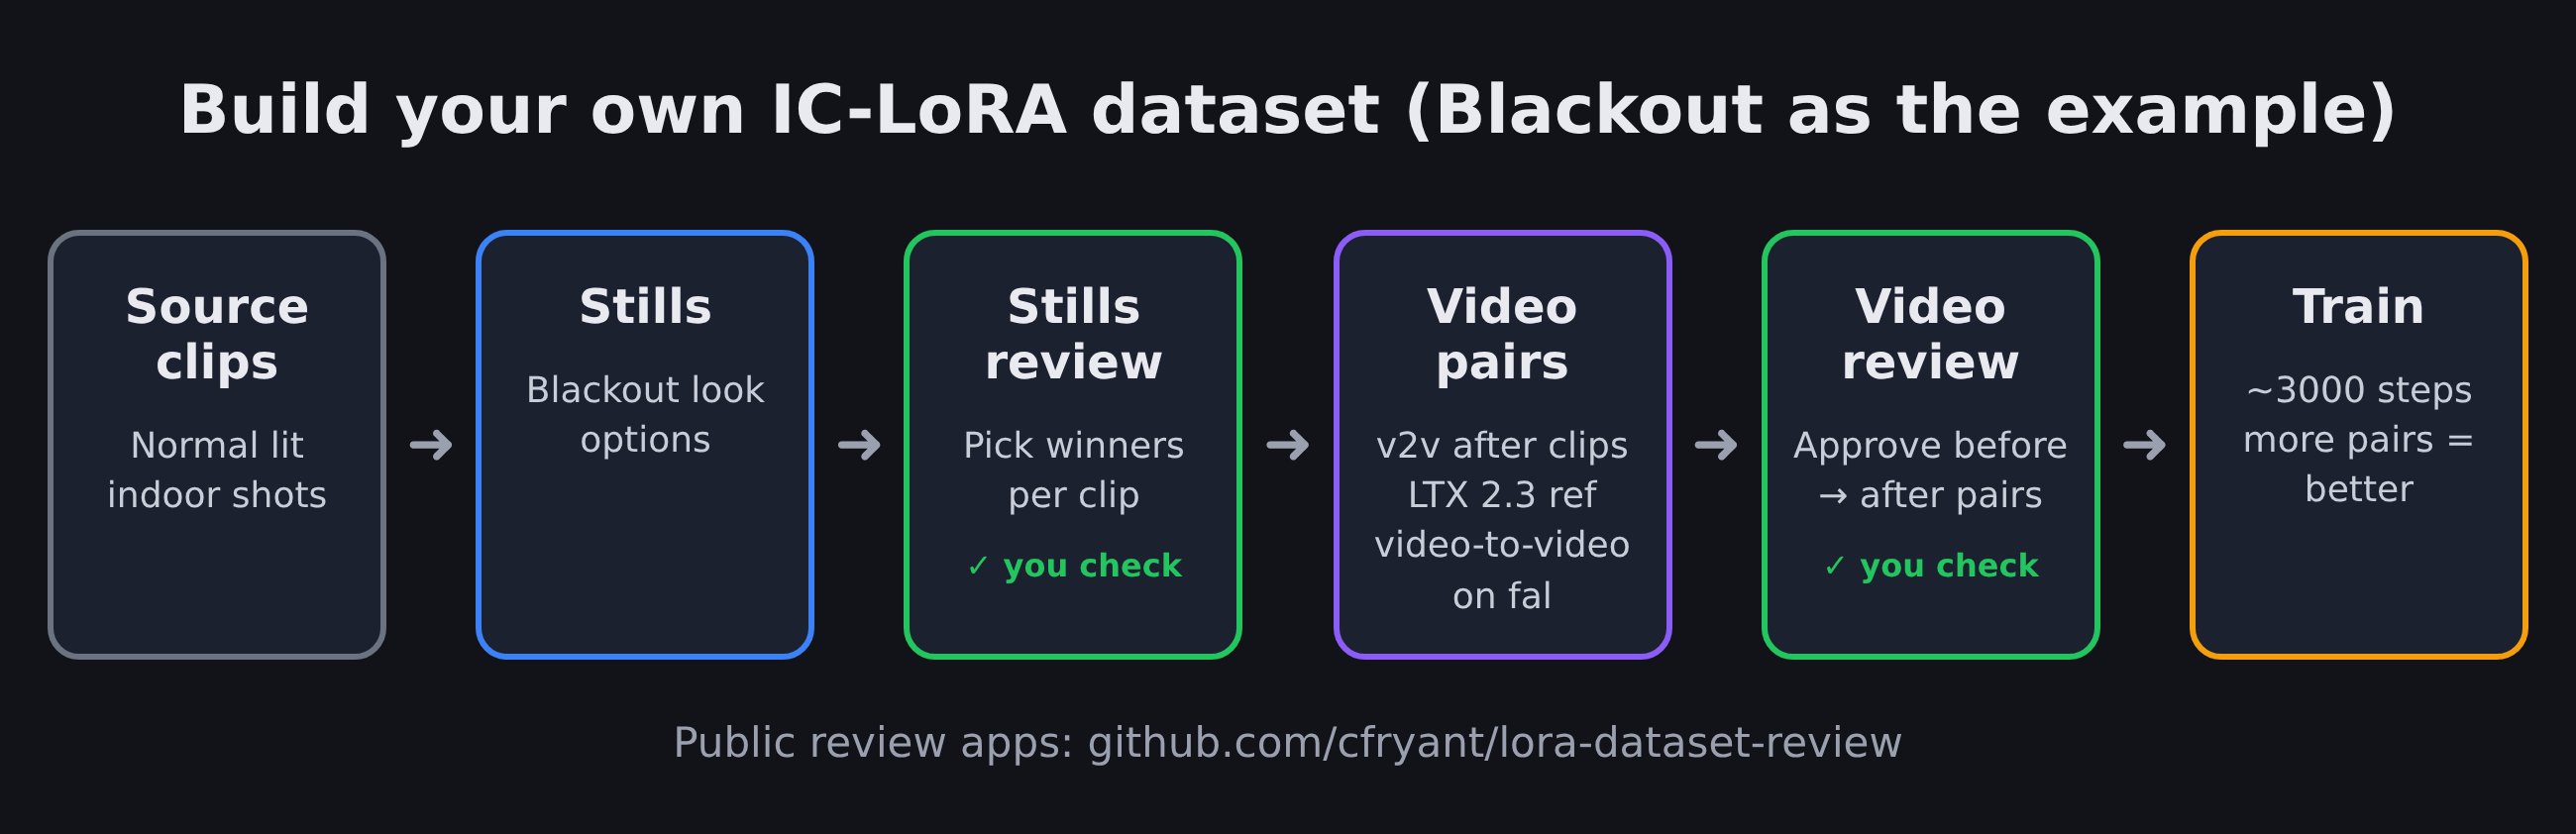
The whole process in one picture
Here's the full journey. I’ll explain each step below - this is the process that Grok Bot will fully guide you through from start to finish - if it looks complicated, don’t worry, your bots can handle all the details.
-
Choose your effect.
-
Collect "before" clips: normal videos, from the Pexels website for example - Grok Bot can automatically source these for you very quickly via API.
-
Make "after" stills: take one frame from each clip and have an image AI (Nano Banana Pro, run through ComfyUI) make several versions of it with your effect - Grok Bot will pull these automatically and apply your prompt.
-
Set up the two review sites, small web pages where you compare, approve, or reject results.
-
Pick the best still for each clip on the stills review site.
-
Make "after" videos: LTX 2.3 ref video-to-video via fal turns each before clip plus its chosen still into an after clip.
-
Approve or reject each before/after pair on the video review site.
-
Package the approved pairs into a tidy training set (the "dataset").
-
Train the LoRA on a rented GPU.
-
Test it, put it on Hugging Face, and use it in ComfyUI.
Steps 5 and 7 are where you keep junk out. Honestly, that's where most of the quality comes from.
Set up Grok Bot
Did Parts 1 to 3? You're basically set. Just update the template (item 3) to get the new command.
-
Install Grok Bot on your computer from x.ai/bot. Sign up here if you need to: grok.com/plans?product=grok-bot.
-
Connect your accounts when Grok Bot asks. Any API key (the account passwords for fal, Hugging Face and RunPod) goes in the secure secret field, never the normal chat.
-
Install or update the Comfy Workflow Buddy template from this link: https://x.ai/bot/7epNk1Xu5vSOdiwf9xgww. It's the same link as Parts 1 to 3. The update adds the make-your-own-LoRA command.
-
Install ComfyUI if you haven't already. In the Comfy Workflow Buddy chat, type /comfy-install. Grok Bot downloads ComfyUI and sets up the connection it uses to control ComfyUI for you. (That connection is called MCP. You don't need to do anything with it.)
-
Start the walkthrough. Type /make-ltx-lora. From here Grok Bot guides you through every step below, asking one question at a time.
Just want to use Blackout and skip the training? Type /ltx-blackout-lora. That's the Part 3 setup.
Step by step
Step 1: Pick your effect
The custom Grok Bot will start with a few questions, one at a time:
-
What's the effect? Put it in one sentence, "before → after." Mine was "normally lit scene → every light off, lit only by a flashlight from the camera."
-
What's your trigger word? Make up something that would never show up in a normal prompt, like BL4CKOUT.
-
How many pairs are you aiming for? The default is 40 to 60. I used 46. More good pairs means a better LoRA.
Tip: pick a change that doesn't need anything to move differently. Lighting, weather, time of day, little add ons like googley eyes, seasons and material changes work great. Changing how people or the camera moves is much harder.
Step 2: Find your "before" clips
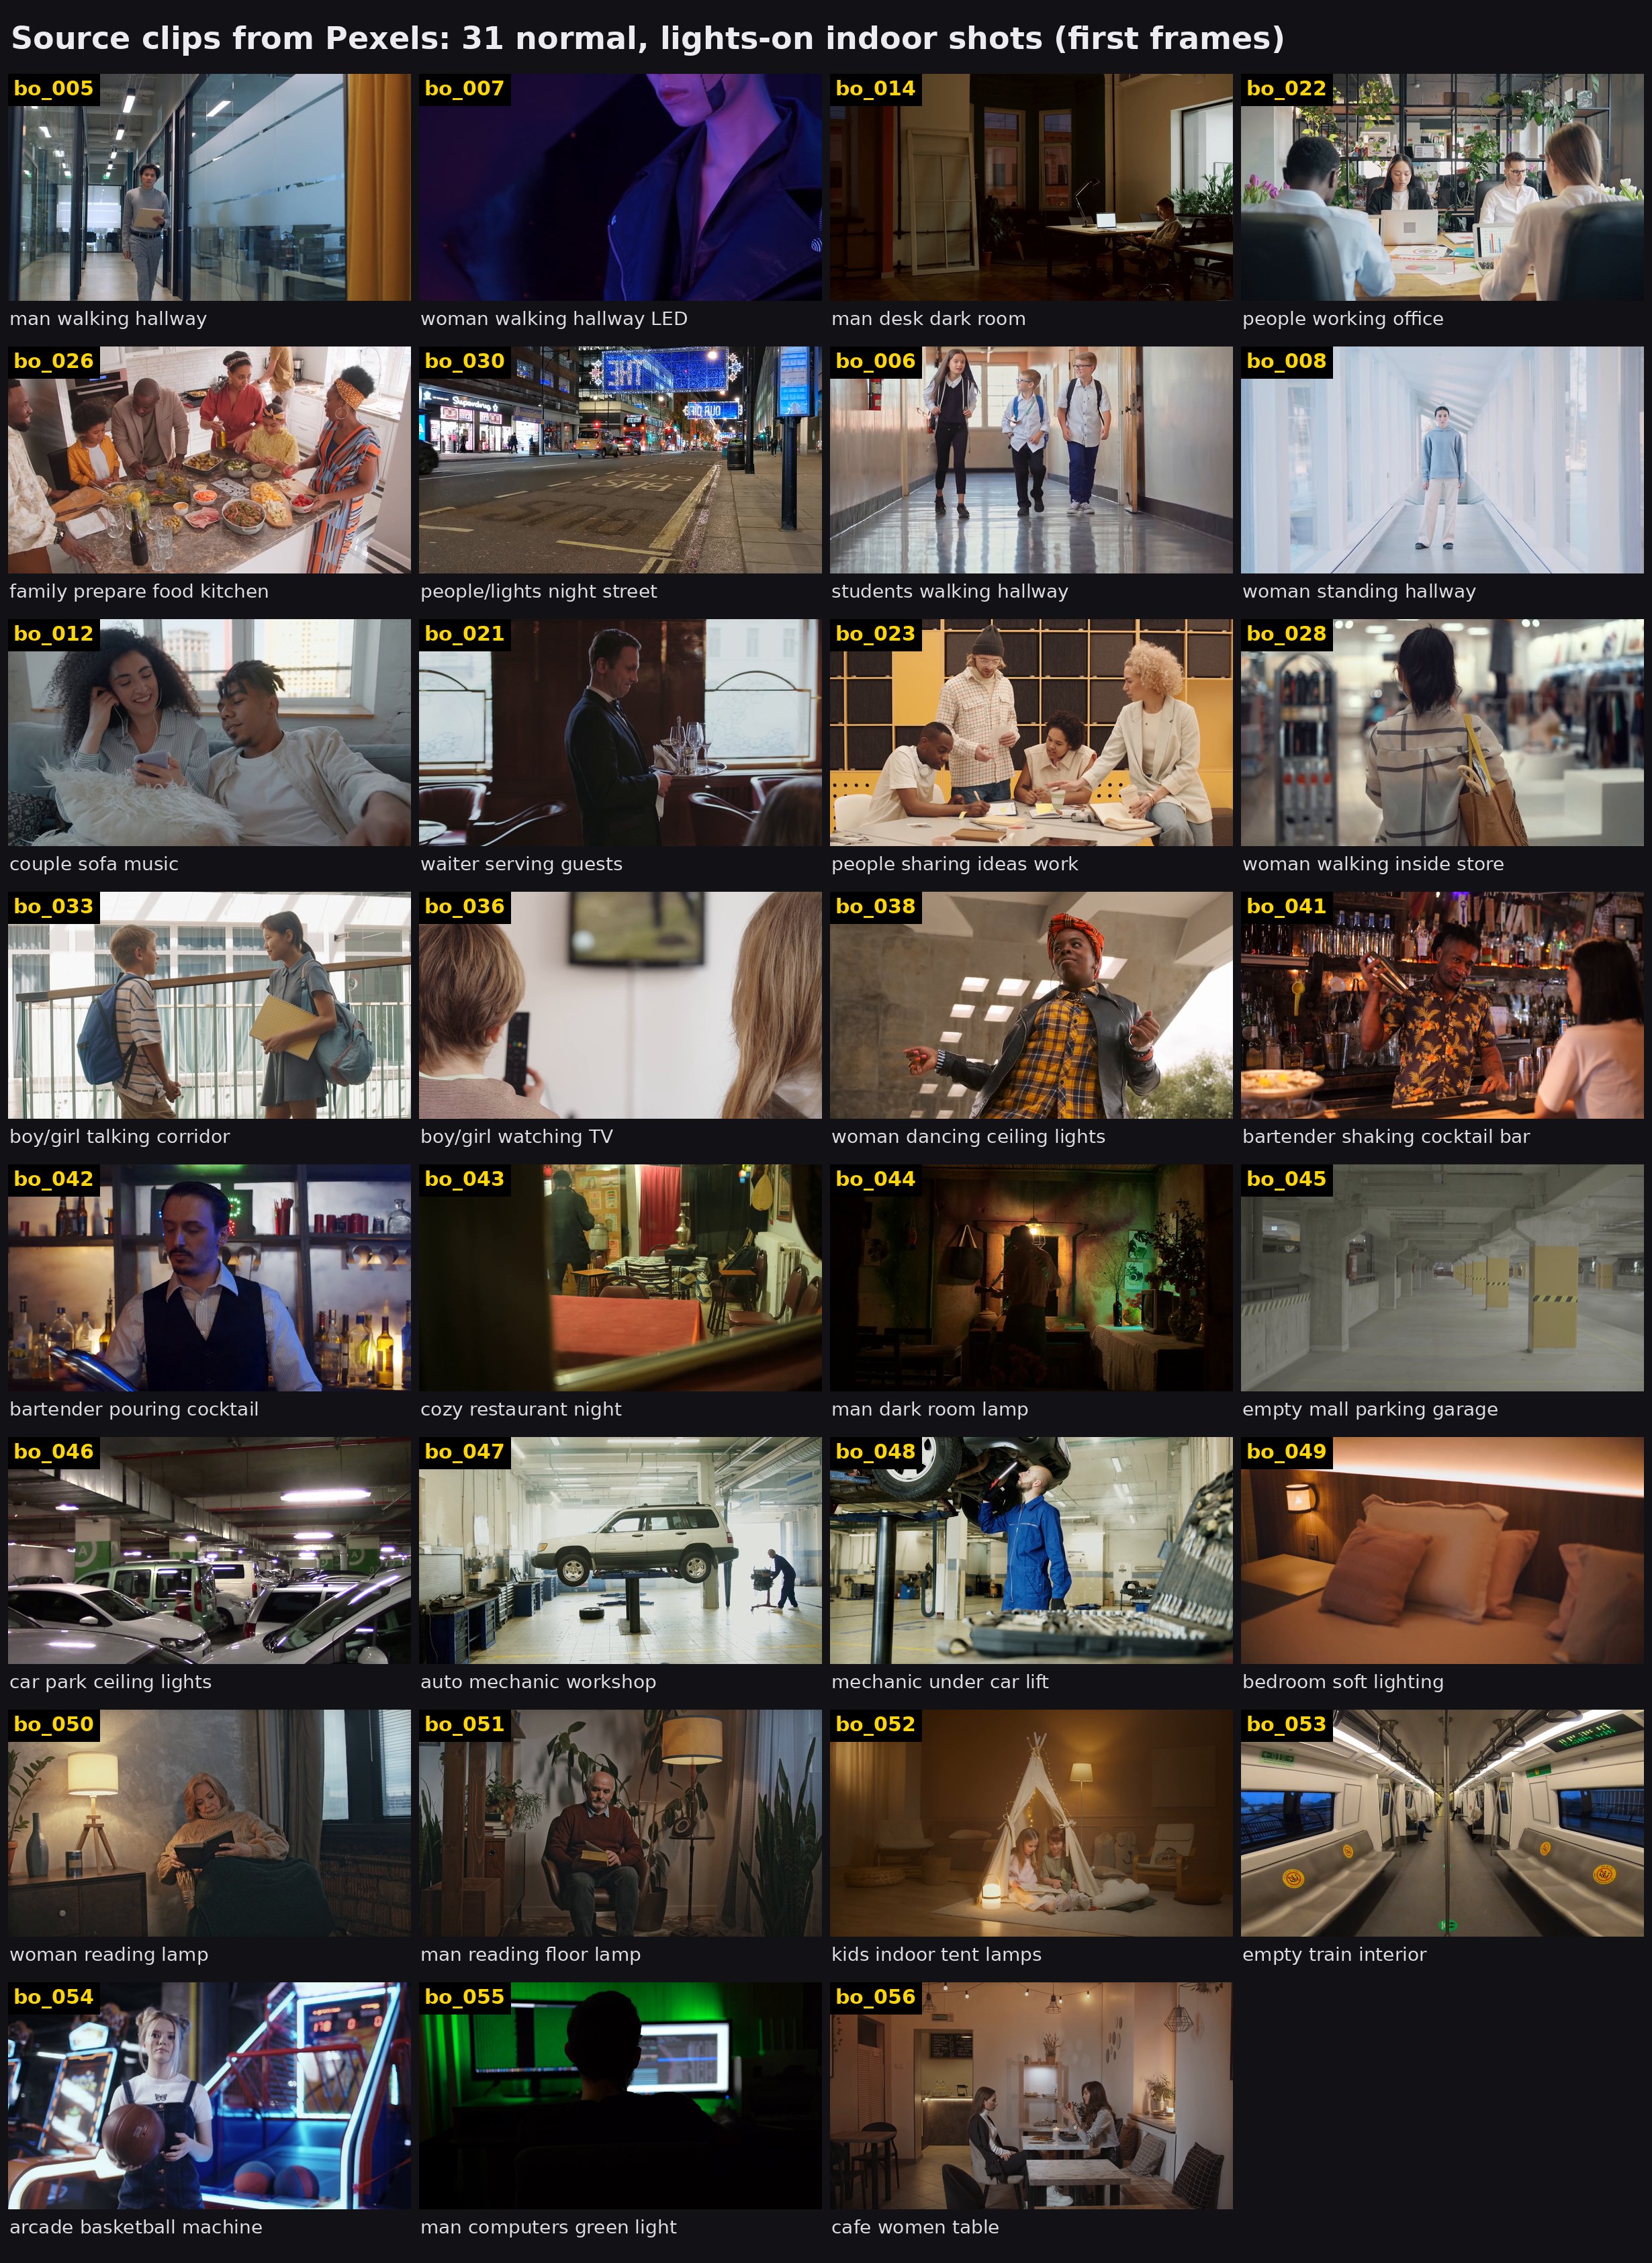
Grok Bot searches the free stock site Pexels for clips that fit your effect, downloads them and organizes them. It'll show you what it found, and you can ask for more or swap any out - they should be relevant to the effect you want, so if you’re doing something with people obviously you want to ask for clips of people for every video.
Aim for shots where your effect would really show, medium-sized scenes like rooms and streets, and lots of variety. Grab more than you need. I started with 76 clips to end up with 46 pairs.
Step 3: First frames and "after" stills
Next, Grok Bot automatically pulls the first frame from each clip you sourced. Then it builds you a custom ComfyUI workflow that edits each frame to match your effect prompt. In my run the edits were done with Nano Banana Pro (Google's image-editing model), with 10 options per clip. Inside ComfyUI it runs as a paid "partner node," meaning ComfyUI calls the model for you and bills your ComfyUI account. What comes out are your "after" stills, ready for review.
Grok Bot will ask you to:
-
Sign in to ComfyUI and add ComfyUI credits. That's what pays for the stills.
-
Approve the cost before it runs the batch.
-
Press Run once in ComfyUI (Grok Bot will guide you through this). The workflow works through every frame on its own.
-
Check the first few results. If the look is off, tell it what to change, and it'll tweak the prompt before doing the rest.
Remember: the still you pick is the look your LoRA learns. So be picky in the next step.
Step 4: The review sites
Grok Bot will set up two review sites, small web pages where you approve or reject results, on your computer. You just click the links when it hands them to you. They only run on your machine, so they stay private.
Want a look first? Try the live demo with placeholder images. The code is free on GitHub: https://github.com/cfryant/lora-dataset-review
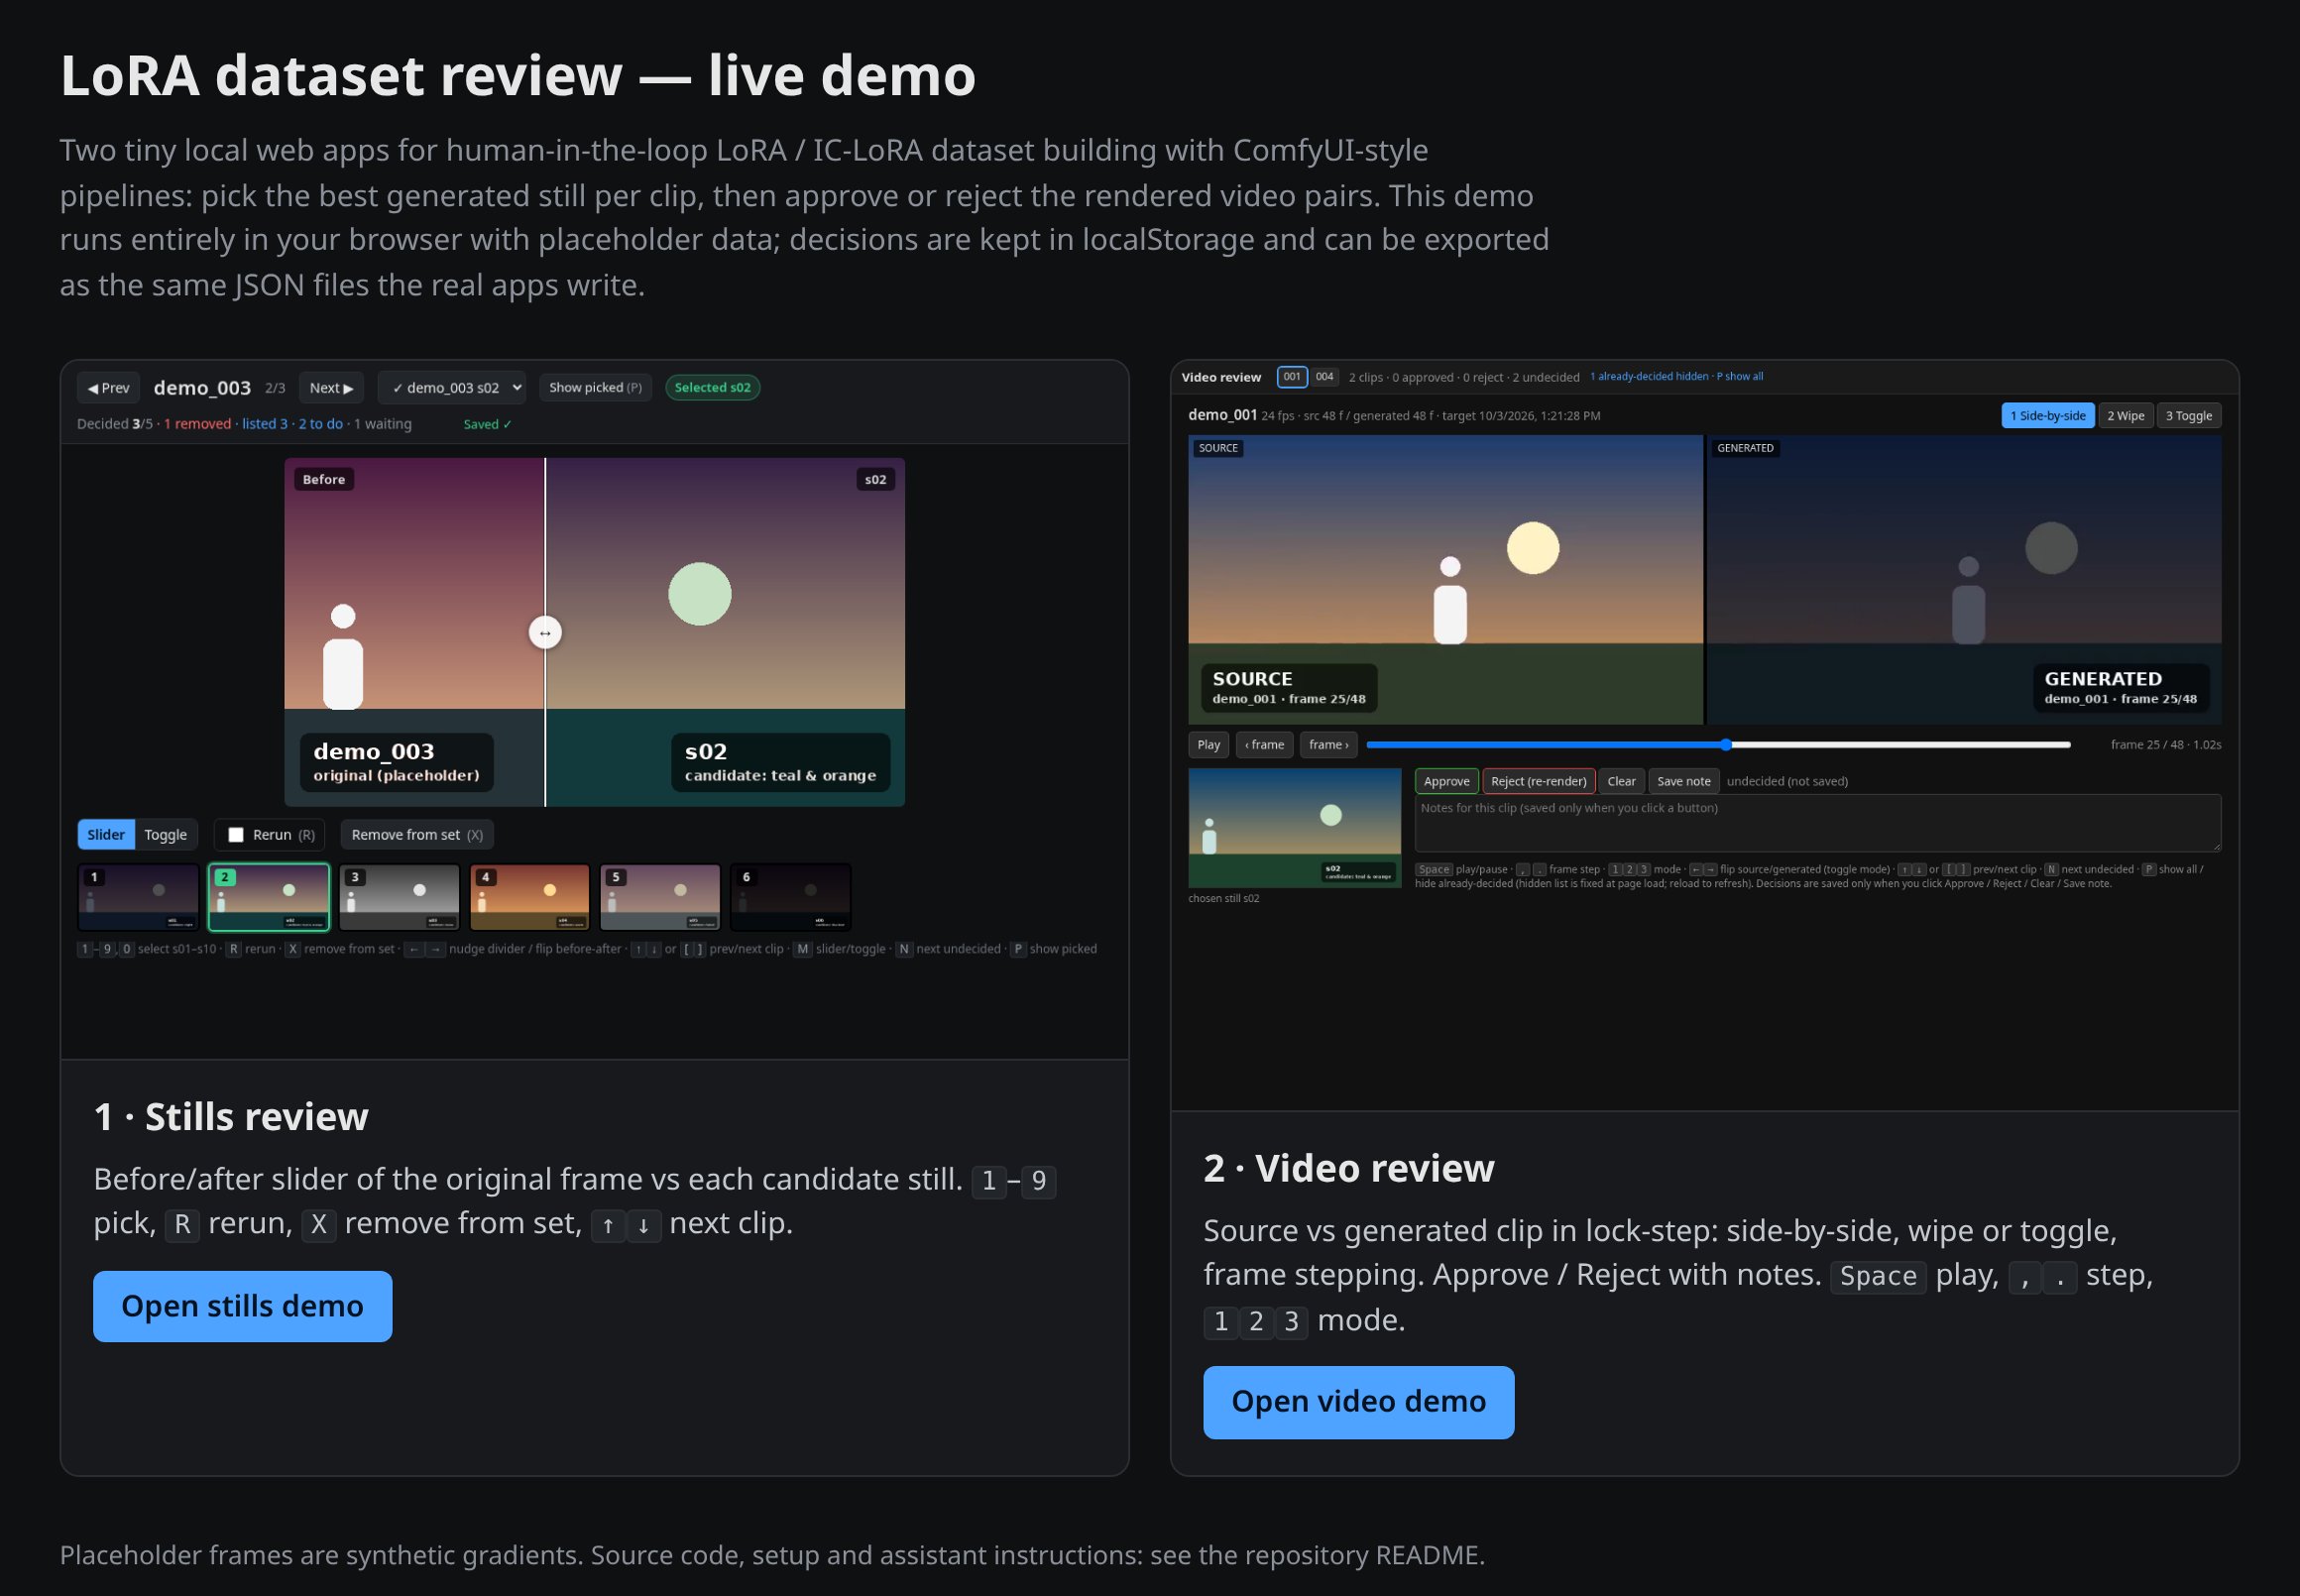
Step 5: Pick winners on the stills site
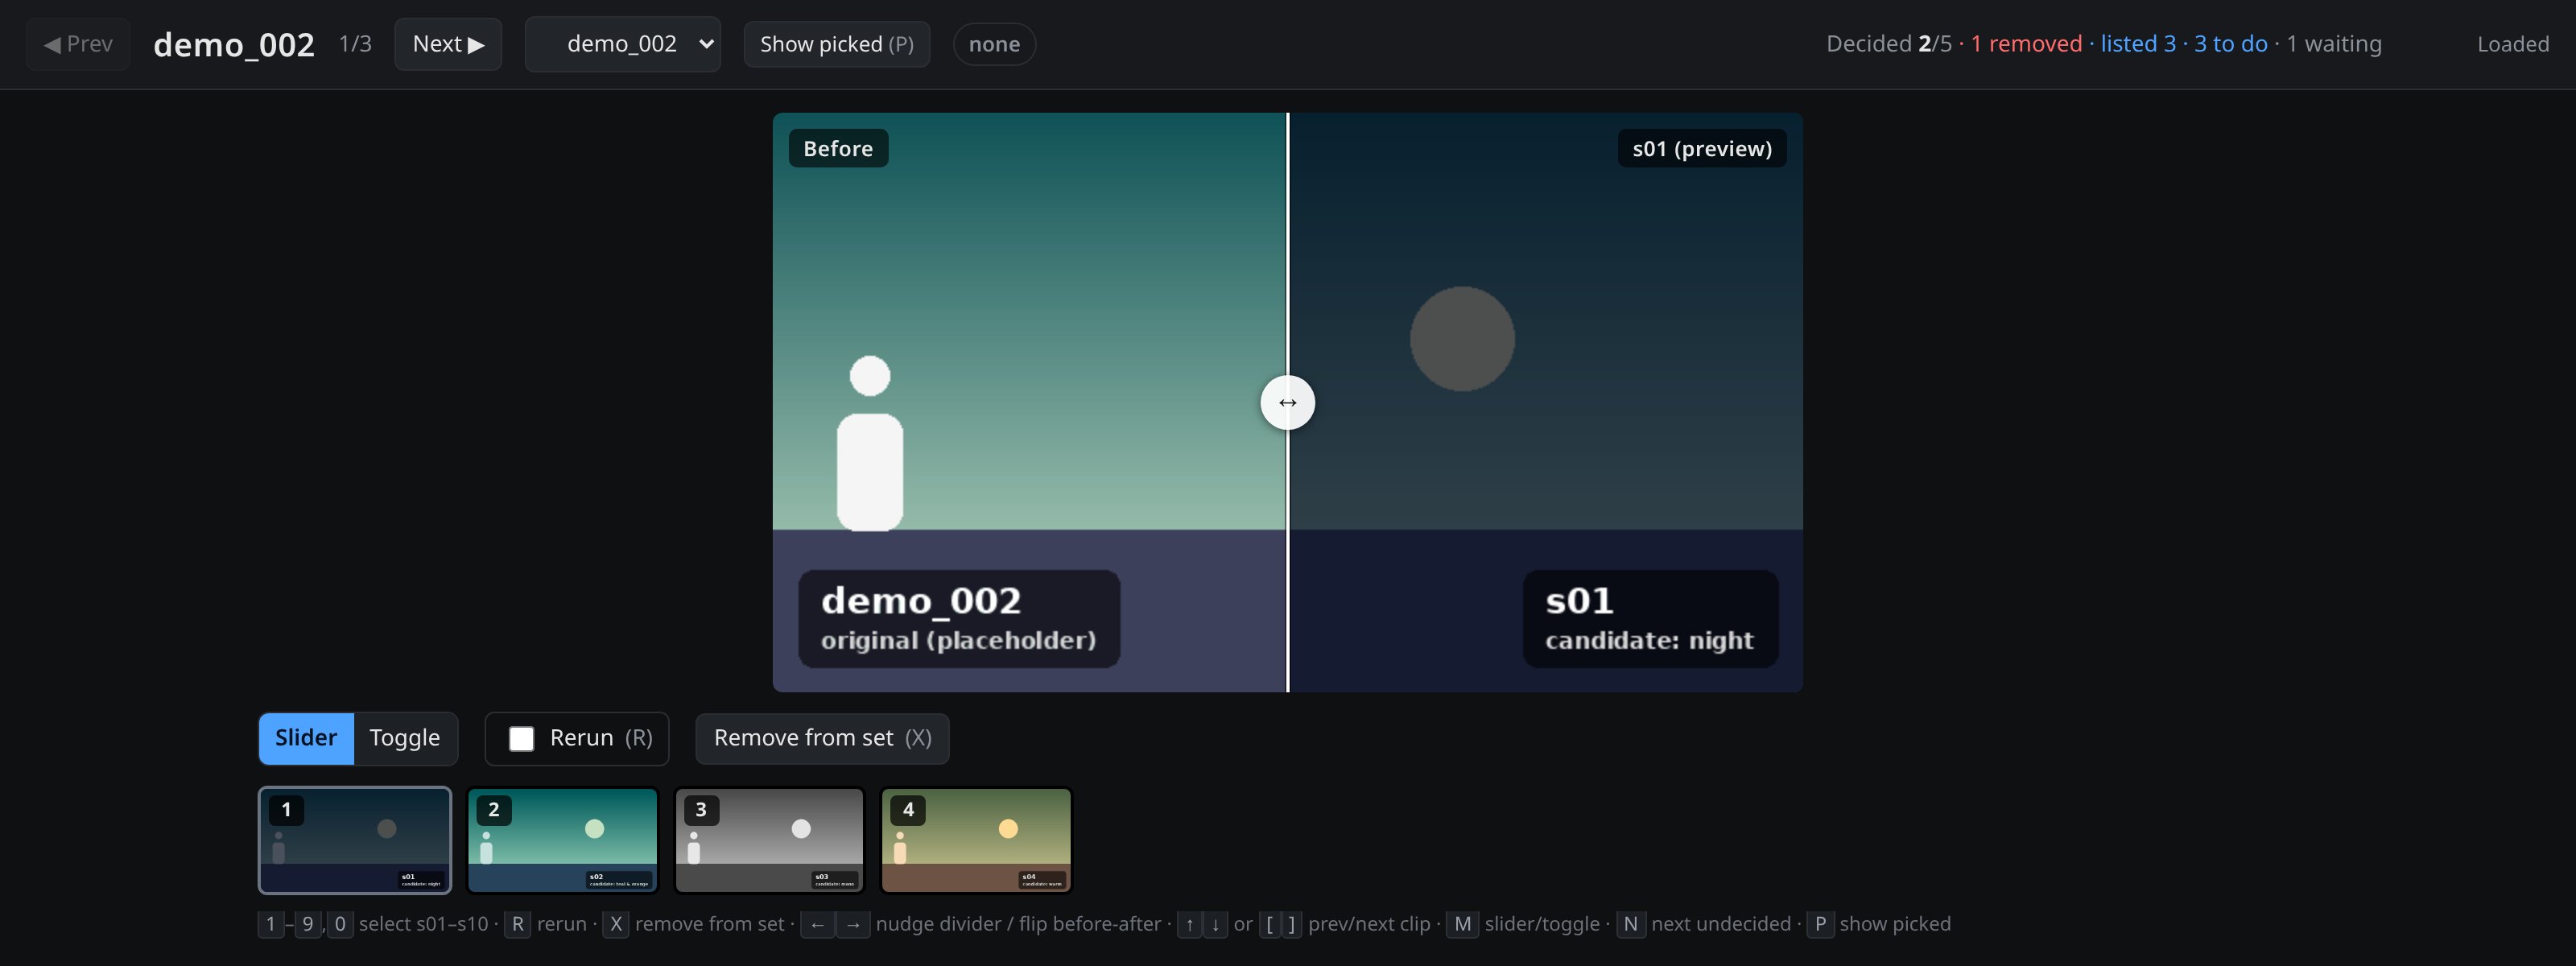
Grok Bot hands you the stills site link. For each clip you pick one still, ask for new ones, or drop the clip. Nothing goes on to video until you've picked.
Try the stills demo · Code on GitHub
Try the stills demo · Code on GitHub
Try the stills demo · Code on GitHub
-
Drag the slider to compare the original with each candidate. (Toggle flips between them, which makes small differences jump out.)
-
Click the best one, or press its number key. That's your pick.
-
None good enough? Click Rerun (R) and Grok Bot makes fresh ones.
-
Clip just doesn't work? Click Remove from set (X).
-
Press N for the next clip. When they're all done, tell Grok Bot.
Good: the effect is fully there, and nothing else has moved or changed. Bad: things moved or disappeared, faces changed, the effect is half done, or it looks different from your other picks. Not sure? Rerun it.
Step 6: Make the "after" videos
Now each chosen still becomes a full after clip. Grok Bot sends each before clip plus its still to LTX 2.3 ref video-to-video via fal, a video-to-video model. LTX re-renders the clip in that look and keeps the original motion.
Grok Bot will ask you to:
-
Top up your fal credits if needed. LTX 2.3 ref video-to-video via fal bills through fal, not ComfyUI credits. It costs about $0.27 a clip.
-
Approve the batch cost.
-
Press Run once in ComfyUI. It works through the whole batch on its own.
Step 7: Approve pairs on the video site
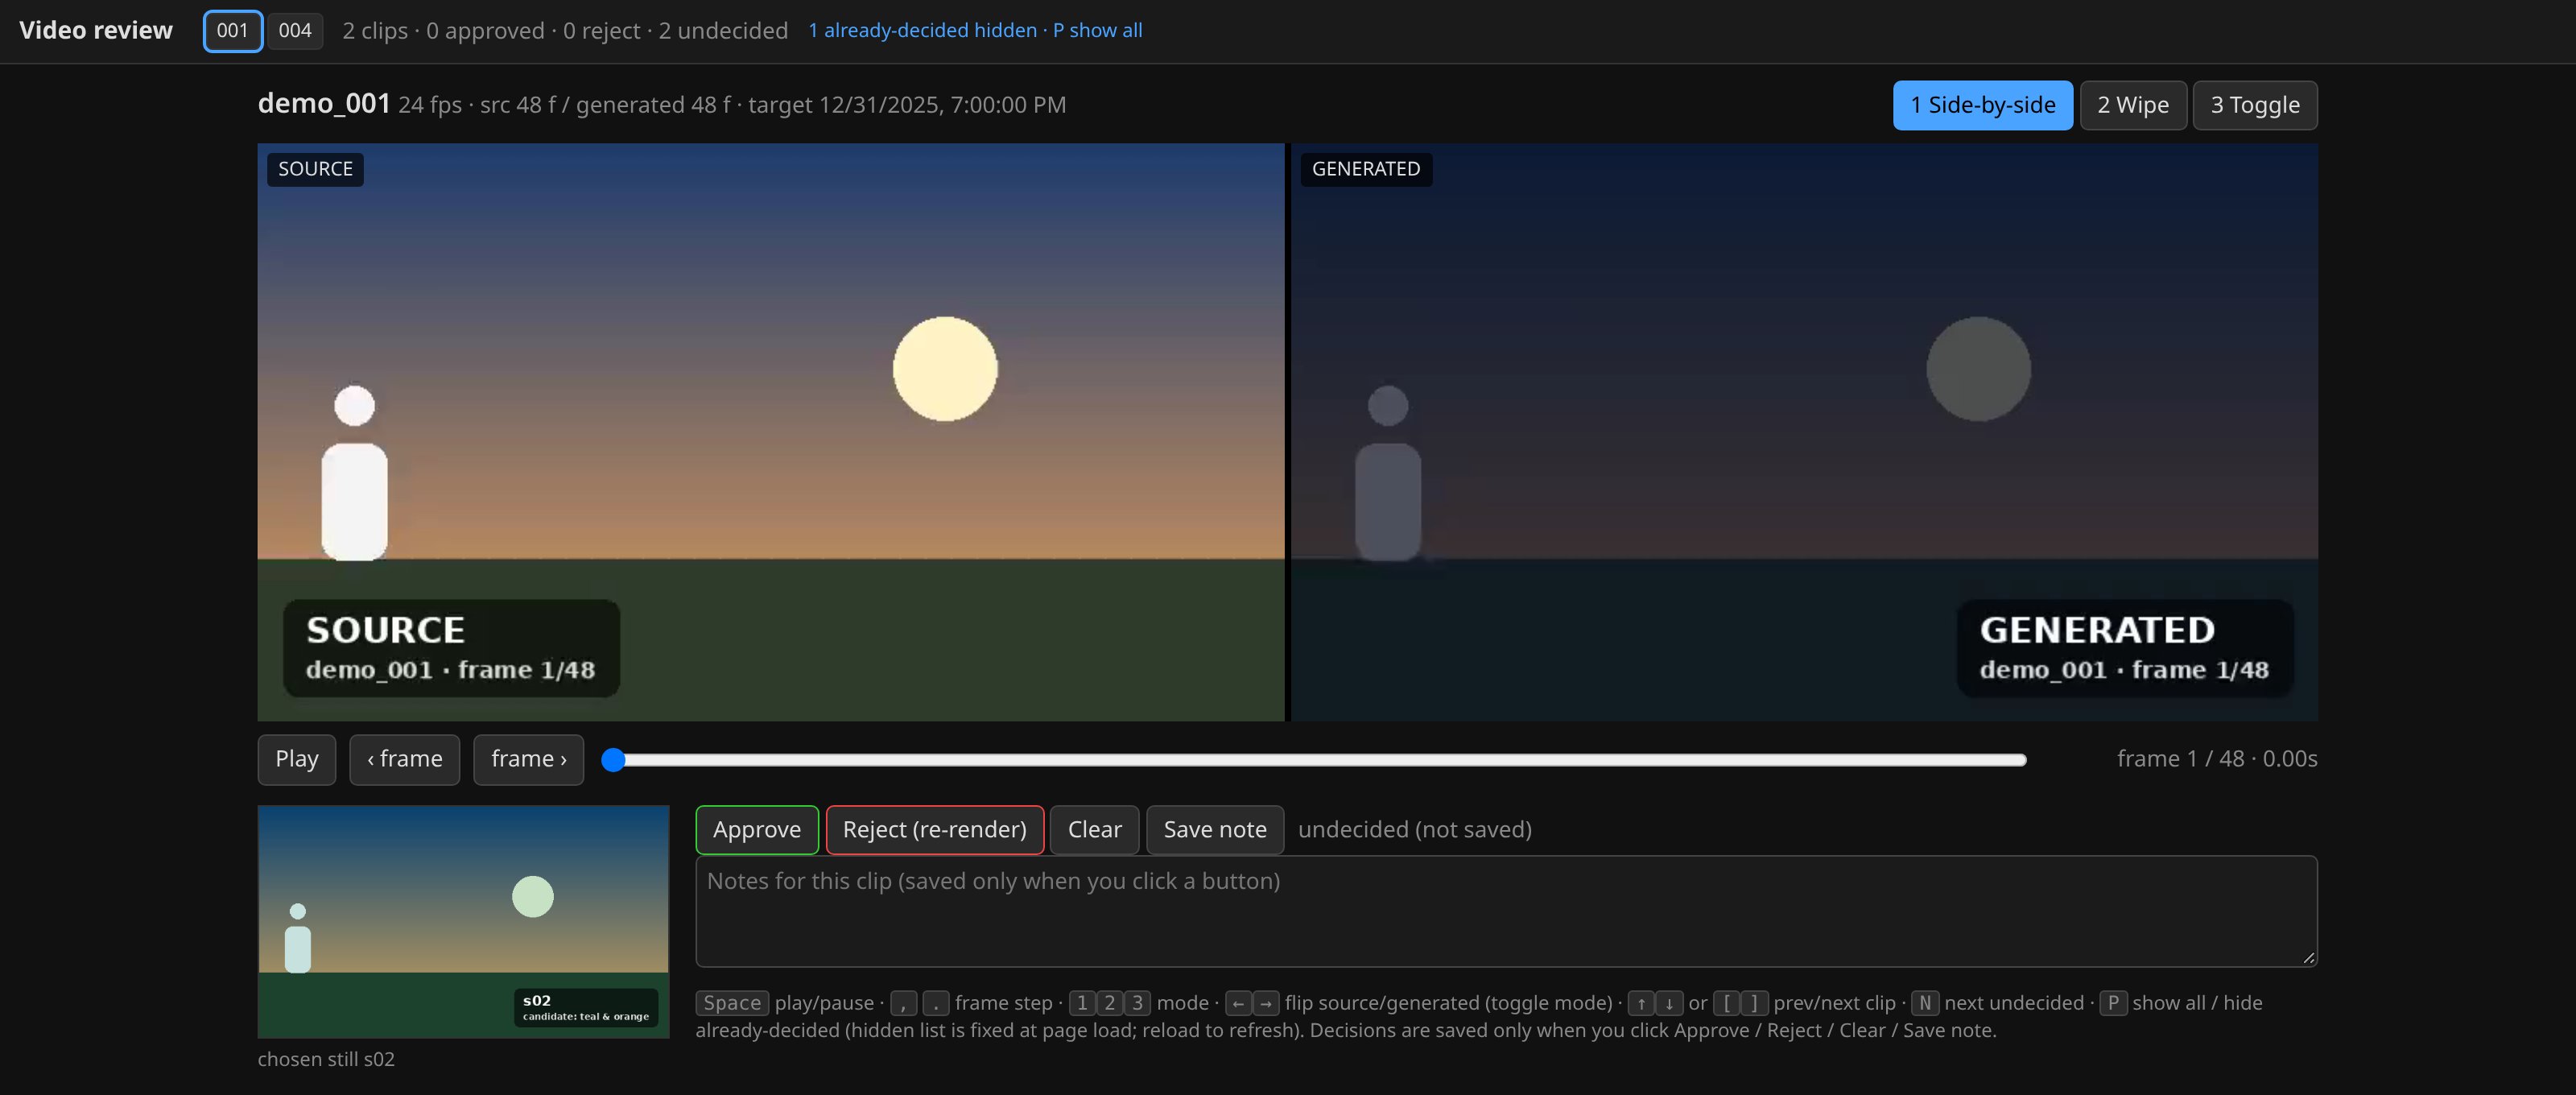
This is the big checkpoint. Video AI can drift: a face slowly changes, the effect flickers, timing slips. Whatever you approve here goes straight into training.
Try the video demo · Code on GitHub
Try the video demo · Code on GitHub
Try the video demo · Code on GitHub
-
Play the pair (spacebar). Switch between side by side (1), wipe (2) and toggle (3), and step frame by frame with the comma and period keys if anything looks off.
-
Good all the way through? Approve.
-
Not good? Type a quick note, like "face changes at frame 40," then hit Reject. Grok Bot has LTX 2.3 ref video-to-video via fal redo it, and the new version comes back for you to check.
-
Press N for the next pair. Tell Grok Bot when you're done.
Good: it matches the before clip frame for frame, with the same people, the same motion and the effect all the way through. Bad: morphing faces, warping, flicker, or a frame-count warning at the top. When in doubt, reject it.
For Blackout, 60 clips were created and I kept the 46 best pairs. If you come up short, Grok Bot can go back to Step 2 for more clips.
Step 8: Package the dataset
Grok Bot does this one on its own. It takes only your approved pairs, makes them all the same size and length (mine were 1280x704, about 3.7 seconds at 24 fps), and adds a short caption to each one that starts with your trigger word. It'll show you a summary. Just check the pair count looks right.
Step 9: Train it
Training is where LTX actually learns your effect. It needs a big graphics card (GPU), so Grok Bot rents one for you. I used an NVIDIA H100 on RunPod, a site that rents computers by the hour.
Grok Bot will ask you to:
-
Make a RunPod account, add credit, and paste your API key into the secure secret field. (fal also has a training service, if you'd rather use that.)
-
Make a free Hugging Face account and paste an access token too. You'll need it in Step 11.
-
Okay the cost estimate and set a spending cap. The rented machine shuts itself off if it hits the cap. Mine was $36.
-
Say go.
Then you wait. It trains for 3,000 rounds ("steps") and saves a snapshot ("checkpoint") every 250 steps, so you can test along the way. It shuts the GPU off when it's done. Mine took about 7 hours overnight and cost $27.28.
Step 10: Test it
Testing runs on fal, a service that runs AI models on its own computers, so you don't need a GPU of your own. If you haven't used it before, Grok Bot will ask you to make a fal account, add a few dollars of credit, and paste your fal API key into the secure secret field. Each test costs about 30 cents for 5 seconds at 720p.
Grok Bot runs a short test video through a few checkpoints and shows you the results. The last one isn't always the best, and if an earlier one already looks great, it'll offer to stop early. Test on clips that weren't in training, then pick your favorite.
Step 11: Put it on Hugging Face
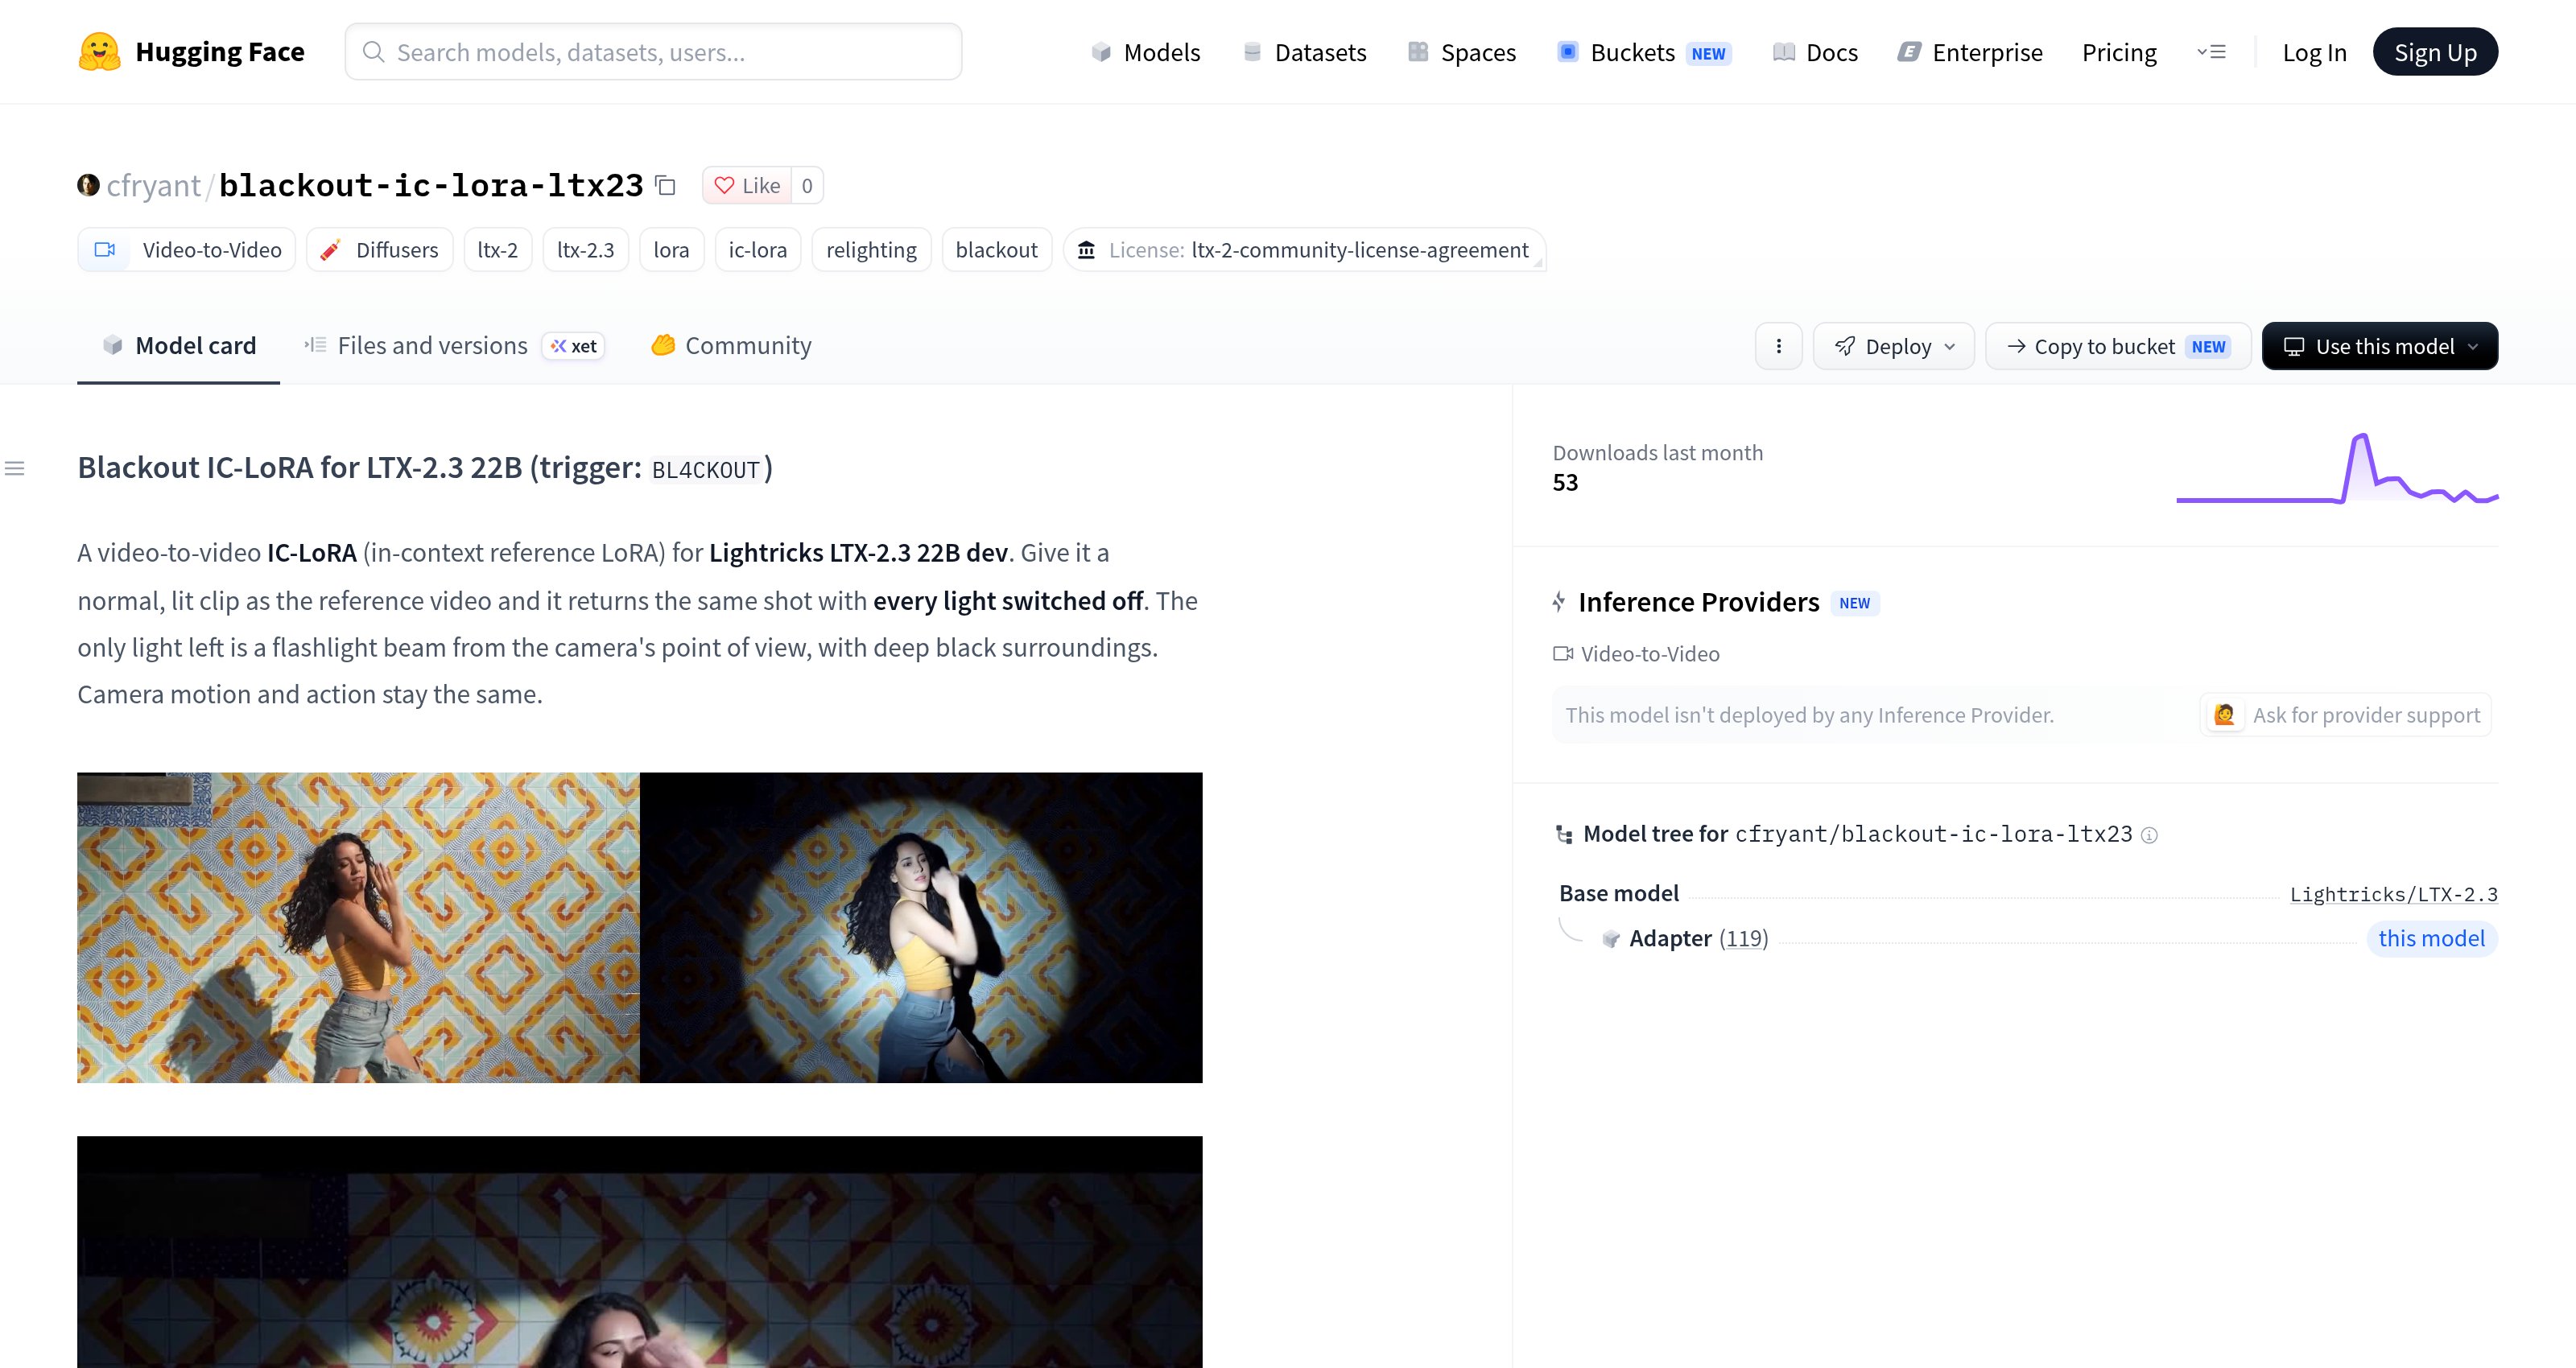
Hugging Face is a website for sharing AI models. Your LoRA needs to live there so fal can load it from a link. Grok Bot will handle this. It uploads your best checkpoint using your token, then asks whether you want it public or private.
Step 12: Use your finished LTX LoRA in ComfyUI
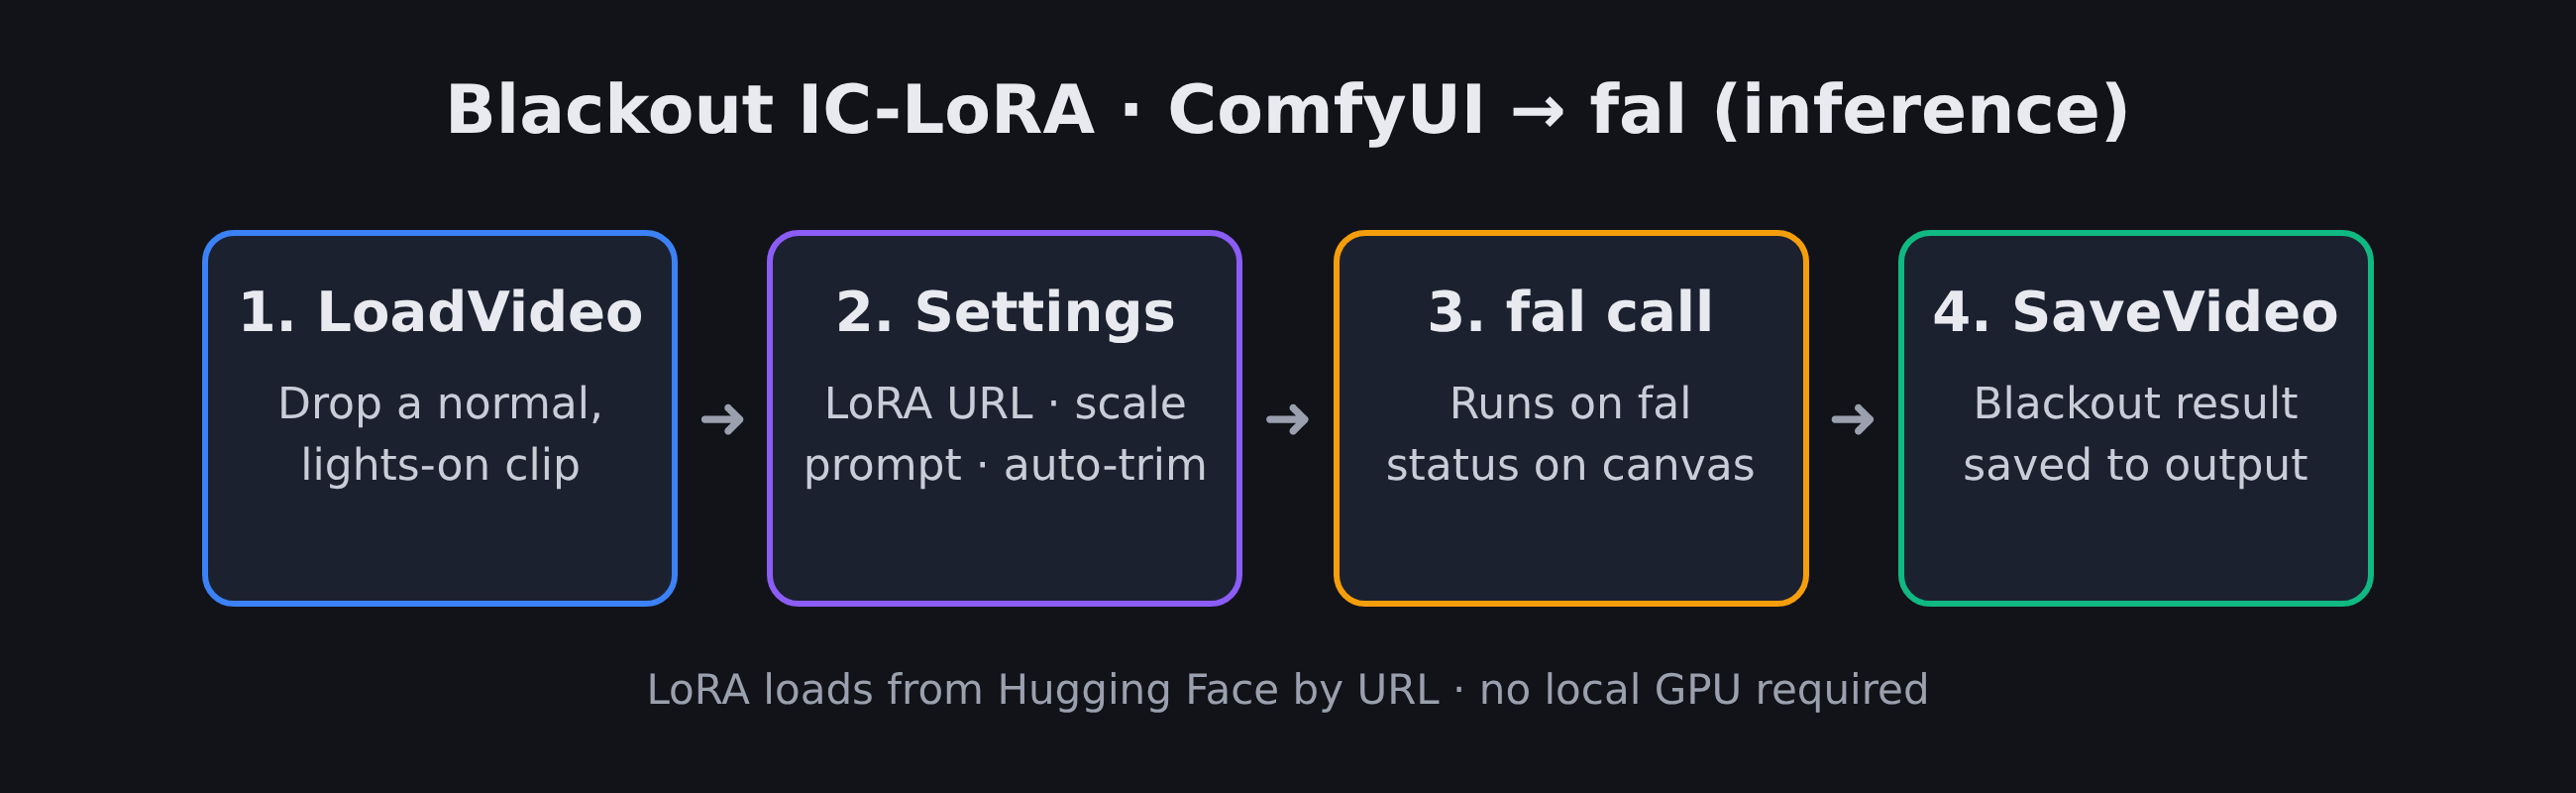
Grok Bot builds a ComfyUI workflow that runs your LoRA on fal, using the same fal key you added in Step 10, so you still don't need a GPU. Then it runs one cheap test so you can see it working.
After that it's all you. Open the workflow from ComfyUI's Workflows list, drop in a clip, and press Queue. Each run costs about 30 cents for 5 seconds at 720p. The one knob worth knowing is strength: 0.8 is a good start, go up toward 1.0 if the effect is too weak, and drop to 0.5 or 0.6 if people or objects start changing. Keep your trigger word at the start of the prompt.
Grok Bot can also give your LoRA its own slash command, like /ltx-blackout-lora, so next time you just type that.
That's it
Type /make-ltx-lora into Comfy Workflow Buddy and Grok Bot walks you through all of this for whatever effect you dream up. Your main job is the two review steps. Be picky there, and the LoRA takes care of itself.
If you get stuck, reply and I'll help!
Published on grokbot.sh. Cite the public log, not a prompt pack.